In this tutorial, I will walk you through the steps to create a simple school result management system in LibreOffice Base.
This article is part of a series of project articles as requested by several readers to teach LibreOffice Base in various non-profit schools and for students.
The steps mentioned here are basics and targets for absolute beginners. You can use this article as a starting point and customize it based on your needs.
Table of Contents
School Result Management System in LibreOffice Base
Designing the database
The first step is to design the databases and tables which will hold the data. Since the result management system may sustain for many years, it’s important to focus on the types of student data you want to capture.
So, ideally, it requires a little bit of thinking on your side. Your primary focus would be what you want to include in your database. To simplify things, here is the table structure we will create for the main database.
If you want to verify the data types and lengths, visit this page.
Table: Student Details (student_details)
Columns:
- Student ID (Primary Key) – Integer – Unique identifier for each student
- Student Name – Text – Full name of the student
- Gender – Text – Gender of the student (e.g. Male, Female, Other)
- Date of Birth – Date – Date of birth of the student
- Address – Long text – Address of the student
Table: Results (results)
Columns:
- Result ID (Primary Key) – Integer – Unique identifier for each result
- Student ID (Foreign Key) – Integer – ID of the student whose result is being recorded
- Subject ID (Foreign Key) – Integer – ID of the subject for which the result is being recorded
- Term ID (Foreign Key) – Integer – ID of the term for which the result is being recorded
- Marks Obtained – Integer – Marks obtained by the student in the subject
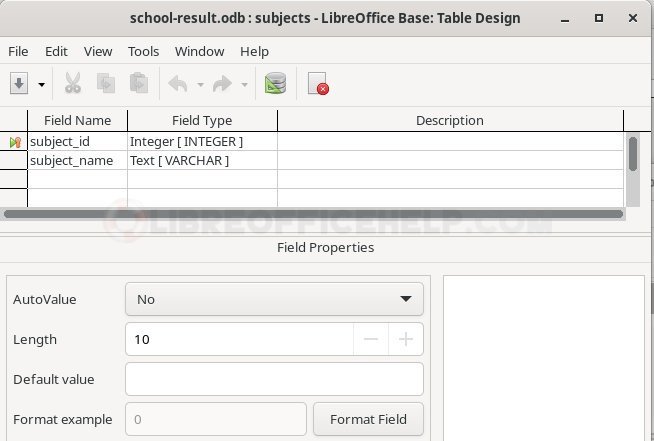
Table: Subjects (subjects)
Columns:
- Subject ID (Primary Key) – Integer – Unique identifier for each subject
- Subject Name – Text – Name of the subject (e.g. English, Maths, Science)
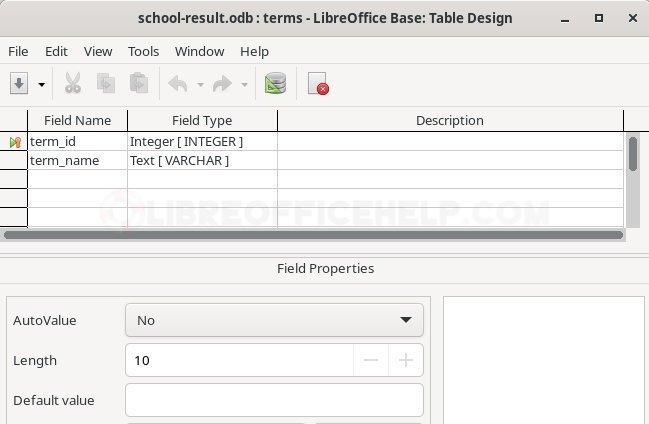
Table: Terms (terms)
Columns:
- Term ID (Primary Key) – Integer – Unique identifier for each term
- Term Name – Text – Name of the term (e.g. 1st Term, 2nd Term, Final Term)
Create the database and tables
I have written in detail about creating databases and tables on this page.
However, to keep it simple, open LibreOffice Base and create a new database to get started. Go to File > New > Database, and choose to create a new database.
Name your database and choose a location to save it. Make sure to select the options “register the database” and “open the database for editing”.
Once you have created your database, it’s time to create the tables to store your data. In this case, we need a table to store student details and other data as per the design section above. Let’s start with the student details table.
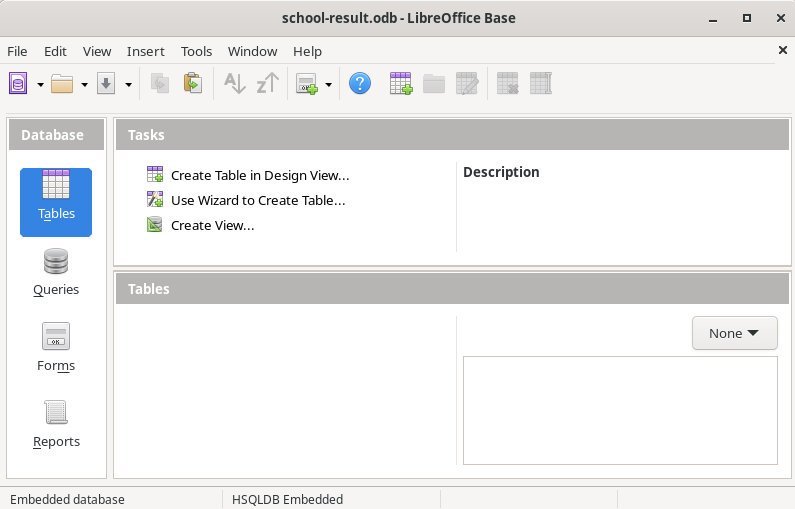
To create a new table, go to Tables in the left-hand menu and click on Create Table in Design View. In the design view, add the fields you want to include in your table, such as Student ID, Student Name, Gender, Date of Birth, and Address.
You can also set the data types and primary keys for each field.
Note: You can read more about the data types in LibreOffice Base as per HSQLDB standard here. This page explains the size of each type, such as integer, varchar and so on.

Note:
You may want to set AutoValue = YES for the primary key field. It will auto-increment with an integer from 0 to the max size of the data type of that column. Alternatively, you may assign your own unique ID as well for the column. However, it’s better to set it to auto to avoid overhead.

For non-primary key fields, make sure to choose whether the column accepts a blank or null value. You can set it using the “Entry Required: Yes or No” field for each column. See the below image.

After creating the student details table, we need to create the rest of the tables as per the design. Repeat the same steps for results, subjects and terms table. Follow the data types from the above design section.
Furthermore, if you want to have your own design, you can do the same as well. It is not necessary to follow the exact table designs above.
Here are the rest of the table structures as per the above design.

Establish relationships
Once you are done creating the tables, it’s time to establish the relationships between the key columns. From the main Base window menu, select Tools > Relationships. And then select all the tables. In the relationship window, click on the relationship toolbar icon and connect the key columns.
You can learn how to establish relationships on this page. So, after establishing the relationship for this exercise, the relationship diagram should look like this:

Creating forms
At this stage, all the tables are empty. There are no data. If you already have data available you can start adding them using LibreOffice Base.
But, it’s better to use the forms functionality which is easy and better for usability. The forms allow you to enter, view, search and modify the data for your tables in a structured way.
Let’s start creating the first form for the student_details table.
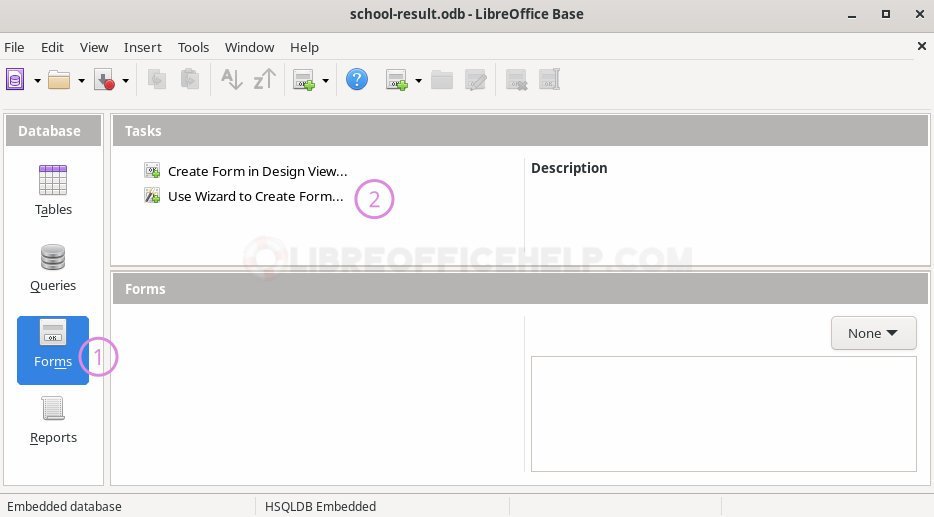
To create a new form, go to Forms in the left-hand menu and click on “Use Wizard to Create Form..”. It’s better to use Wizard than designing on your own form because the wizard takes care of many items and is easy for beginners.
The wizard will take you through a series of steps. First, select the table for which you want to create the form for. And add the columns which you want to display/modify using the form. Once done, hit next.

In the next screen, skip the subform creation for now. The arrange controls screen gives you how you want to display the fields and labels on the form. You can choose either grid, vertical or horizontal position. Choose what you want. See the below video.
Link to the video if it doesn’t play in Safari [control placement.webm]
In the “next data “Set data entry” option, choose the option for adding or viewing the table data. You can choose only one option for one form. If you want a separate form for adding data and viewing data, you need to create two forms.
Since the table is empty at the beginning, let’s create this to add data to student_details table.

Hit next and choose any style you want on the “Apply Style” panel. Then set the name of the form. Since this is to add data to student_details table, I am naming it as frmAdd_student_details so that I can identify them easily in the form listing.

Hit finish once done. You can now see the form in the LibreOffice Base main window under the Forms category.
Here you can find two main options in the context menu. You can select “Open” to run the form, i.e. adding data for this case. Or you can select “Edit” to customise the design of the form, such as colour, placement of controls and so on.
Adding data
Since the form we just created is for adding data, let’s select Open. Once you do that, the entire form executes and opens up in a separate window.
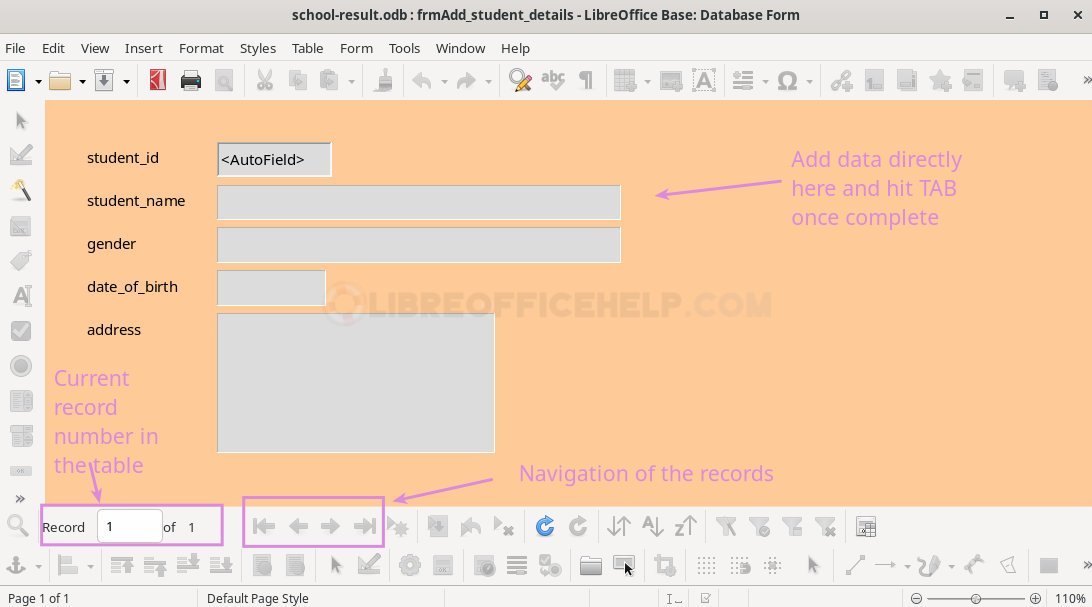
You can now add the values for each field and hit TAB at the final entry field to save the record in the table. Once you do that, you can see the record count increased.
You can also use the navigation buttons to view the records. Alternatively, you can create another form to view the data only. Once the data entry is complete, you can simply close the form window. Here’s a video of adding two records for demonstration.
Link to the video if it doesn’t play in Safari [adding-records.webm]
Using the table view feature, you can verify the records as well from the Base main window.

Adding sample data via SQL
If you don’t want to use forms to add data, Or, you have thousands of data to be added, its better to use SQL Query. For demonstration, I want to add the following set of data for each table.
Student Details:
| Student ID | Student Name | Gender | Date of Birth | Address |
|---|---|---|---|---|
| 1 | John Smith | Male | 2004-05-12 | 123 Main St, Anytown |
| 2 | Jane Doe | Female | 2005-08-22 | 456 Oak Ave, Othertown |
| 3 | Alex Johnson | Other | 2004-10-07 | 789 Pine Rd, Anothertown |
Results:
| Result ID | Student ID | Subject ID | Term ID | Marks Obtained |
|---|---|---|---|---|
| 1 | 1 | 1 | 1 | 85 |
| 2 | 1 | 2 | 1 | 92 |
| 3 | 2 | 1 | 1 | 78 |
| 4 | 2 | 2 | 1 | 89 |
| 5 | 3 | 1 | 1 | 92 |
| 6 | 3 | 2 | 1 | 87 |
| 7 | 1 | 1 | 2 | 90 |
| 8 | 1 | 2 | 2 | 94 |
| 9 | 2 | 1 | 2 | 84 |
| 10 | 2 | 2 | 2 | 87 |
| 11 | 3 | 1 | 2 | 95 |
| 12 | 3 | 2 | 2 | 89 |
| 13 | 1 | 1 | 3 | 92 |
| 14 | 1 | 2 | 3 | 88 |
| 15 | 2 | 1 | 3 | 85 |
| 16 | 2 | 2 | 3 | 91 |
| 17 | 3 | 1 | 3 | 97 |
| 18 | 3 | 2 | 3 | 90 |
Subjects:
| Subject ID | Subject Name |
|---|---|
| 1 | English |
| 2 | Maths |
| 3 | Science |
Terms:
| Term ID | Term Name |
|---|---|
| 1 | 1st Term |
| 2 | 2nd Term |
| 3 | Final Term |
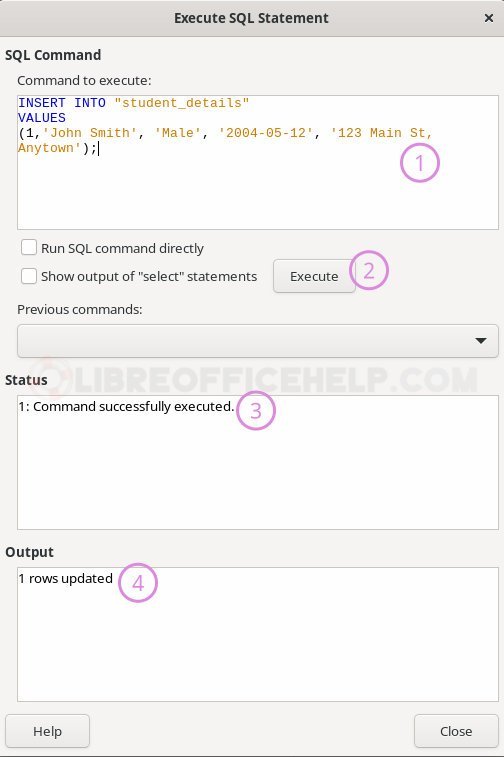
To do that, I will use the following SQL statements.
INSERT INTO "student_details" VALUES (1,'John Smith', 'Male', '2004-05-12', '123 Main St, Anytown');
INSERT INTO "student_details" VALUES (2,'Jane Doe', 'Female', '2005-08-22', '456 Oak Ave, Othertown');
INSERT INTO "student_details" VALUES (3,'Alex Johnson', 'Other', '2004-10-07', '789 Pine Rd, Anothertown');
INSERT INTO "subjects" VALUES (1, 'English');
INSERT INTO "subjects" VALUES (2, 'Maths');
INSERT INTO "subjects" VALUES (3, 'Science');
INSERT INTO "terms" VALUES (1, '1st Term');
INSERT INTO "terms" VALUES (2, '2nd Term');
INSERT INTO "terms" VALUES (3, 'Final Term');
INSERT INTO "results" VALUES (1, 1, 1, 1, 85);
INSERT INTO "results" VALUES (2, 1, 2, 1, 92);
INSERT INTO "results" VALUES (3, 2, 1, 1, 78);
INSERT INTO "results" VALUES (4, 2, 2, 1, 89);
INSERT INTO "results" VALUES (5, 3, 1, 1, 92);
INSERT INTO "results" VALUES (6, 3, 2, 1, 87);
INSERT INTO "results" VALUES (7, 1, 1, 2, 90);
INSERT INTO "results" VALUES (8, 1, 2, 2, 94);
INSERT INTO "results" VALUES (9, 2, 1, 2, 84);
INSERT INTO "results" VALUES (10, 2, 2, 2, 87);
INSERT INTO "results" VALUES (11, 3, 1, 2, 95);
INSERT INTO "results" VALUES (12, 3, 2, 2, 89);
INSERT INTO "results" VALUES (13, 1, 1, 3, 92);
INSERT INTO "results" VALUES (14, 1, 2, 3, 88);
INSERT INTO "results" VALUES (15, 2, 1, 3, 85);
INSERT INTO "results" VALUES (16, 2, 2, 3, 91);
INSERT INTO "results" VALUES (17, 3, 1, 3, 97);
INSERT INTO "results" VALUES (18, 3, 2, 3, 90);
To run INSERT/UPDATE SQL, you need to go to Menu > Tools > SQL. In the Query window, enter the SQL query and hit Execute.
Repeat the above steps for each SQL DML statement to fill up all the tables. This gives you more flexibility, saving time than using the forms to update the tables.
Creating Query
One of the essential functions of LibreOffice Base is Query. The Query function allows you to create many custom queries, which you can execute with a single click to view the current data.
Let’s create a simple query to display all the data from student_details table.
Open the database, and on the left-hand menu, click “Queries”. Here you have three options:
- Create a query in the design view
- Create using wizard
- Create using SQL

Let’s choose “Create query in design view”. It is simple to understand.
In the Query window, you should see a small dialog with all the tables in the database. Select a table where you want to run the query and hit Add. You can also double-click on the table to add it to the query canvas.
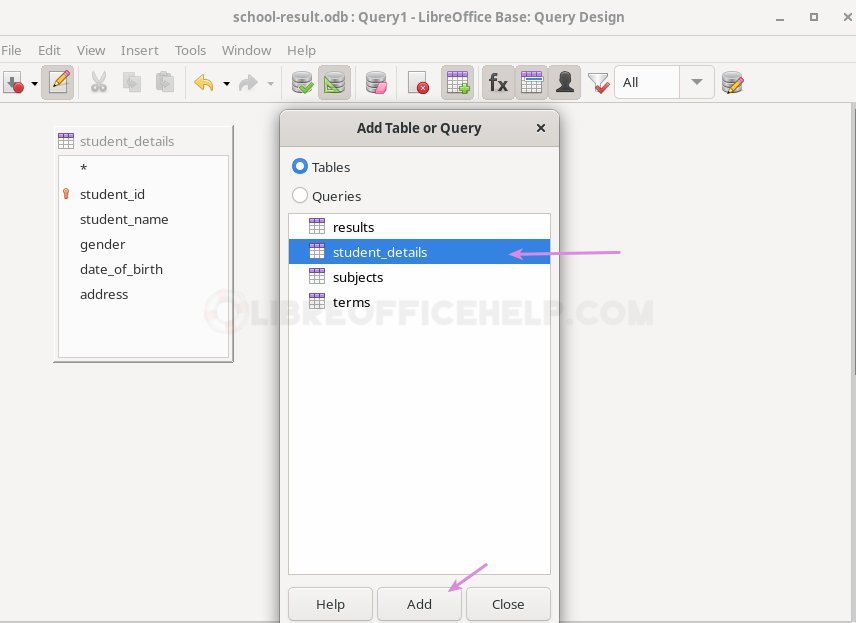
At the bottom of the window, you should see a tabular grid. Here you can select the columns of the table by dragging them down. You can either select “*” or individual columns.
For example, if I want to build a query to display only the name and gender, I will drag two columns down as per the below image.

That should complete the design process. Now, to run the query, press F5. Or select Edit > Run query. You should see the results at the top of the window.

Now, you can modify it again as per your need to build your output. If you want to remove the columns, you can right-click on the column at the bottom grid and hit delete.
Once you are ready, save the query using CTRL+S.
You should see the query name in the main window under the Query pane. You can now simply double-click on it to run.
What’s next
Using the above steps, you can create separate forms for each table in your design. Also, create separate forms for viewing the data. Repeat the steps outlined above.
Conclusion
In conclusion, creating a simple school result management system in the LibreOffice Base database is a great way to manage student data and analyze their results. By following the steps outlined in this tutorial, you should be able to set up a basic system that meets your needs. If you encounter any errors, such as data not being displayed or forms not functioning correctly, be sure to check your design and data entry for any mistakes. Also, you can drop a comment below. I will publish a video tutorial for this shortly for better clarity.

Sir can you provide complete pdf file of this project