A simple guide demonstrating how you can add borders in a LibreOffice or OpenOffice Writer document.
Borders in a document can improve your document’s readability and overall aesthetics. It applies to both online and physical printed documents. LibreOffice and OpenOffice Writer provide simple tools for adding borders to various elements within your documents.
Here’s how.
Table of Contents
Add Borders in LibreOffice Writer
- Open the LibreOffice Writer document where you want to add the border.
- Navigate to the target page.
- Right-click on the empty section of the document and click on Page Style.
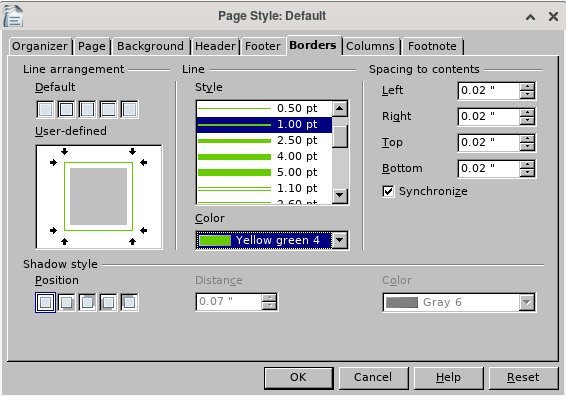
- In the Page Style dialog, go to the “Borders” dialog.
- Select the border pattern from “Line arrangements” presets and Styles.
- You can also choose the colours of the border.
- LibreOffice also gives you options to create shadow, padding, shadow colour and more.
- Once finished, hit apply.


Add borders in OpenOffice Writer Document
- Open the OpenOffice Writer document where you want to add the border.
- Navigate to the target page.
- Right-click on the empty section of the document and click on Page.
- In the Page Style dialog, go to the “Borders” dialog.
- Select the border pattern from “Line arrangements” presets and Styles.
- You can also choose the colours of the border.
- LibreOffice also gives you options to create shadows, and padding.
- Once finished, hit apply.


Wrapping up
In this article, you learned how to add borders in LibreOffice and OpenOffice Writer. It’s very basic, and you can use the same concept for further customization of your document. Remember, when you apply the borders using the above steps, it gets applied to all the pages of Writer document. If you want different border styles for different pages, then try using styles.
