In this article, we will talk about how to create simple database and a table. And then add some data to the table.
Table of Contents
1 . Create Database and Tables in LibreOffice Base
To create a database, open LibreOffice Base from the application menu. Typically you should see a window like the one below.
Here you have three options.
First, you can go ahead and create a brand new database for your work.
Second, if you have already created a database, then open that from this window.
And thirdly, you can connect to an external data source. LibreOffice supports a wide range of datasource with modern protocols.

As of LibreOffice Base version 7.4.3, the following external database or datasource are supported.
- JDBC
- Oracle JDBC
- Groupwise
- Evolution LDAP
- Evolution Local
- Spreadsheet
- dBASE
- Firebird External
- Text
- MySQL/mariaDB
- ODBC
- Writer Document
2. Create database in LibreOffice Base
- For this guide, we will create a new database and a table. Select “New database” and click Next.
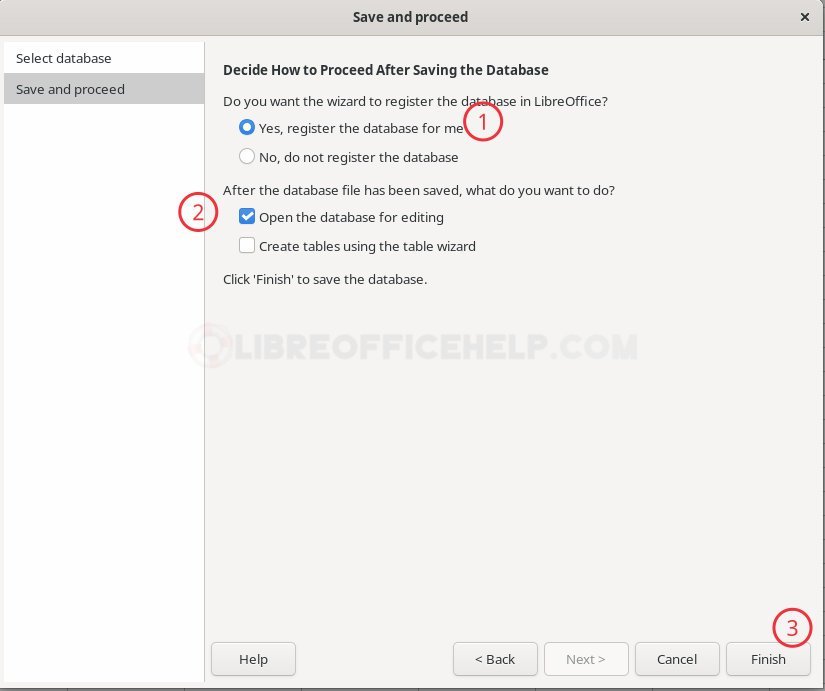
- The next dialog will ask about registering the database. Click Yes. And select “Open the database for editing”.
- You can also select “create tables using the table wizard” to create a table in the newly created database. Furthermore, you can do that later as well.
- Click Finish.
- Once you click on Finish, Base will ask you to save the database to your local Laptop/desktop. Give a name and save the file.
- LibreOffice Base database file format is *.odb, which is ODF Database File.
What is registering database? When you register the database file, it tells LibreOffice on how you data in the database is structured, saved and other details. And you can access the LibreOffice Base database file as datasource in other applications. The register option is available under Tools > Options > LibreOffice Base > Database. This is for manual register and de-register a database.
Congratulations! You have now created a database. Now, let’s take a look how you can create a table.
3. Create table in LibreOffice Base Database
Then main LibreOffice Base window gives you access to it’s main four core features:
- Tables
- Queries
- Forms
- Reports
See at the left section of this below image. You can select your tasks after choosing database actions.
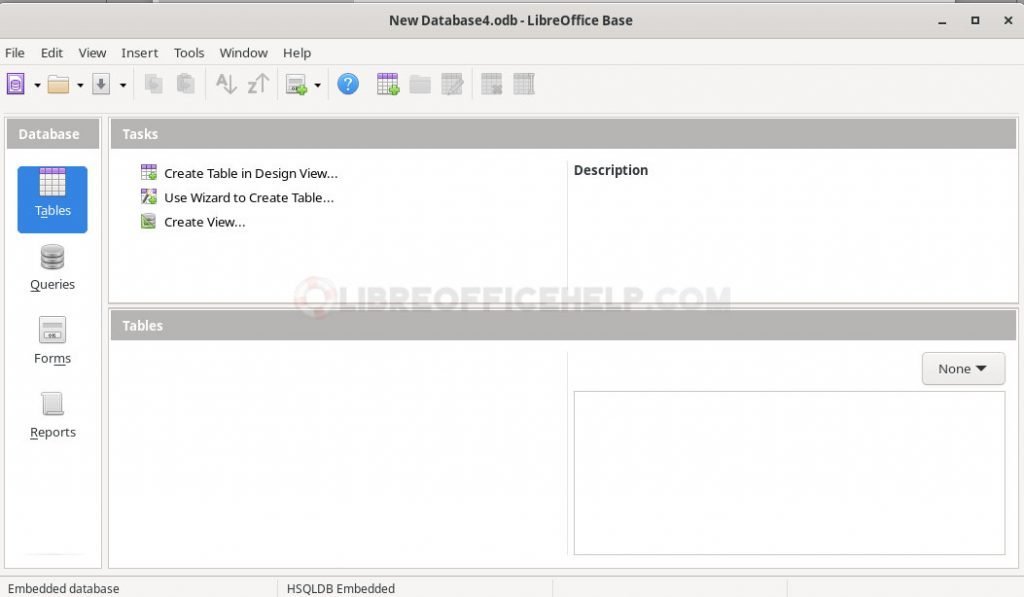
For this tutorial, select Tables and click on “Create Table in Design view“.
LibreOffice base will open a table design window where you can add the columns and their column properties. In the first grid, enter the column names (under “Field Name“) and the type (under “Field Type“) of it. At the bottom, you have additional options to create a table. See this image for detailed clarification.
If you are unsure about the field type, such as VARCHAR, TEXT, or INT – refer to this index on what you should choose for your table.
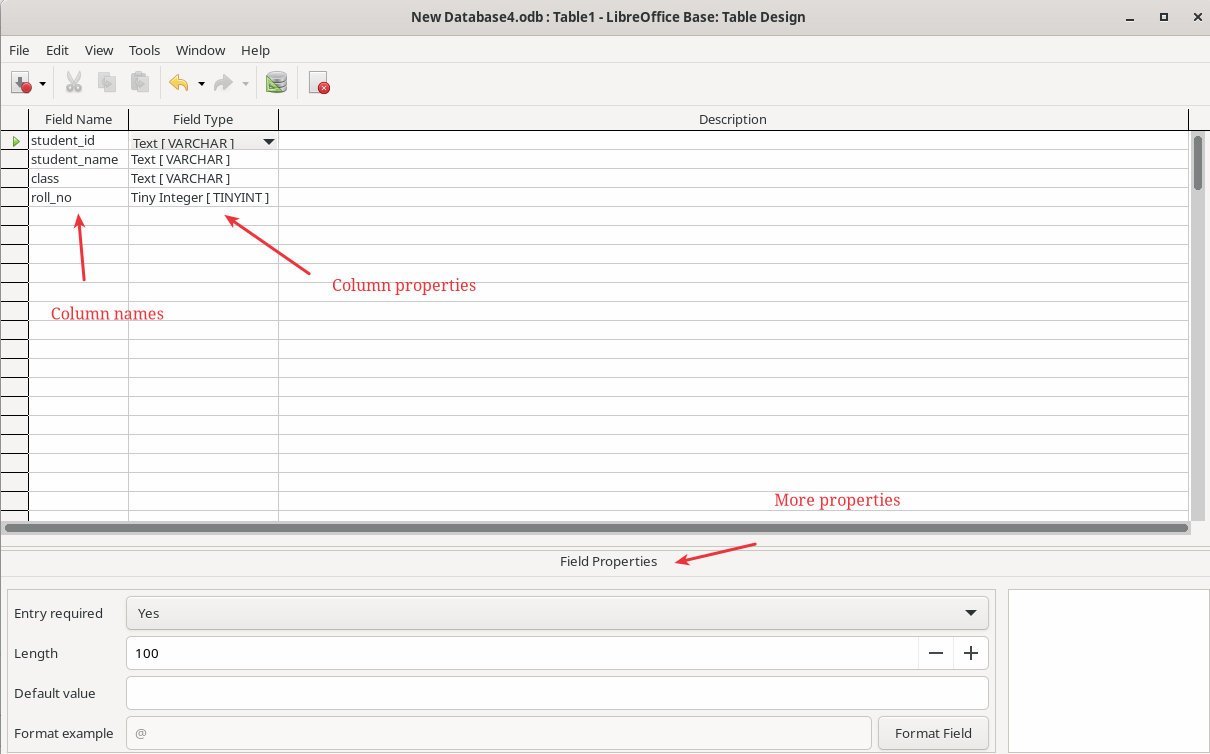
Ideally, you should have a primary key for each tables. Primary key column contains unique data which can be used to find out a particular row of record via SQL or programming. To assign a column as primary key, right click on the column name and select Primary Key check box from the context menu.
Only one column should be a primary key column. In addition, if you want to remove the Primary Key assignment, right click again and uncheck the option.

Once you are satisfied with all the information, click on Save to save the table. During saving, LibreOffice Base will ask for the table name which you can mention.

4. Inserting Data to the table in LibreOffice Base
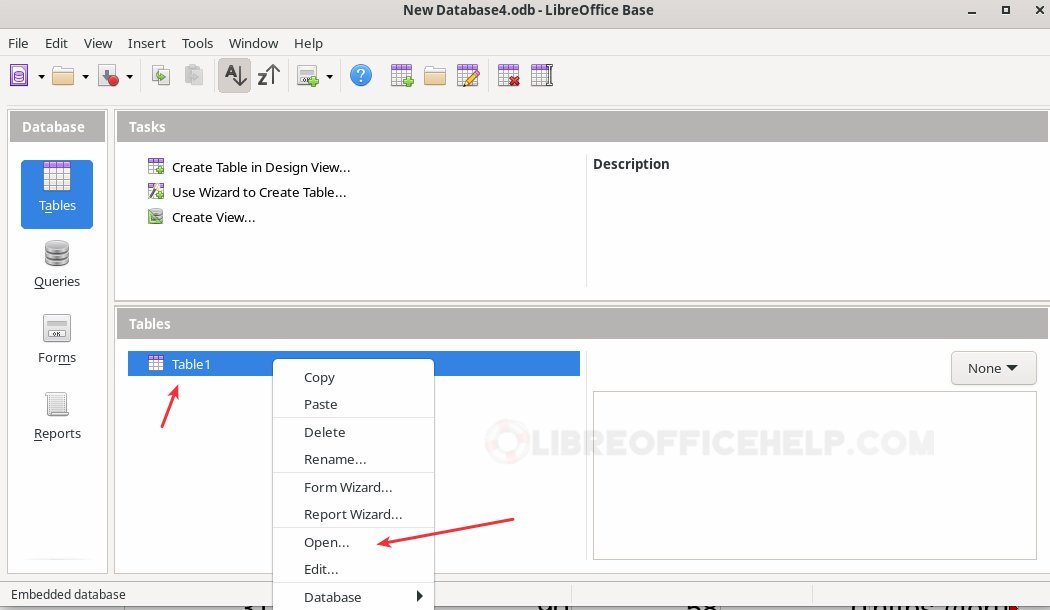
Once you saved the table, you should see it in the main LibreOffice Base Database window. Now you can right click on it to get several option which you can do on the table.
To add some data to the table, right-click and select Open.
Now, you can start entering the data for each of the column you created in LibreOffice Base. This grid works as a simple spreadsheet. And the data you enter are autosaved. The total number of records are shown at the bottom.
Once you are done you can close the window.

And that’s it. You have successfully created a database, a table and added some data as well. Now you can create more tables as per your needs.
Wrapping Up
In this article, you learned how to create a simple database in LibreOffice and create tables. Stay tuned for more articles in LibreOffice Base.
